Table of Contents
Many people that live in areas that get too cold to ride in the winter should look into winterizing their ATVs. Winterizing is just getting your quad ready to sit for several months at a time. It always sucks when winter rolls around because you don’t want to have to put your ATV into storage but if you know how to properly do it then you will save a lot of time, money, and heartache if something decides to tear up because you didn’t winterize properly, or even at all.
Some people live in climates that are warm enough, or just not cold enough to ride all year long. I really envy people in these climates in the winter months because I like to ride and want to do it all year long. In climates that are warm enough you don’t even need to winterize your ATV because it will be in constant use. When I lived in Utah, we used to get snow every year, and plenty of it, so I made sure that I at least did the bare minimum winterizing so it would be ready for the next year. Most times I would do the full process to make sure my quad was ready as soon as the weather warmed up a bit.
How To Winterize An ATV in Less Than 10 Minutes
The absolute bare minimum maintenance you must do to winterize your ATV is
- Use Fuel Stabilizer – Fill your tank all the way up with gas and add your fuel stabilizer.
Fuel stabilizer keeps the fuel from breaking down inside the gas tank and keeps water from forming. - Remove the Battery – Remove the battery from the ATV.
If you remove the battery and let it sit all winter, it may still drain. Purchase a “drip” or smart charger like this one from Amazon and it will charge up the battery only when it depletes some charge.
I have used Battery Tender brand chargers since I started riding my Yamaha R6 back in 2006 and use them for all my vehicles. They work great and have small footprints and will keep you from spending $50-$100 dollars each winter because your battery went dead from it sitting on your bench or in your garage.
That is it for the “under 10 minute” part of winterizing your ATV. If you are anything like me and like to keep up on the maintenance of your rides then you will want to check out the detailed version and winterize to ensure the long life of your ATV.
Thoroughly Winterize Your ATV in 1.5 Hours
There are 12 key steps to fully winterizing your ATV and there are 12 distinct reasons why you want to ensure they are performed. All 12 reasons will help ensure the longevity of your ATV and protect your investment for years and years to come. It takes discipline to actually follow through and maintain vehicles like these to make sure they receive the proper care and attention they need.
Clean Your ATV
Most of the time us ATV owners only know how to make a mess but it is very important that we also know how to clean up our ATV. The first thing you want to make sure you do is to cover your intake box and exhaust area with plastic bags so no water gets in them. You can get a muffler plug and an air box seal that will seal those areas but I find a plastic bag works just fine as long as you tape it on.
Washing down starts with a good pre soak. Take your hose and spray down the entire ATV making sure to get all the nooks and crannies. Let it sit there for about 10 minutes and start breaking down the mud and gunk. Now spray it off with as much pressure as you can get. If you are going to use a pressure washer do not use it on the seat, plastics, bearings, or electronic parts. Make sure you use a detergent and was down everything with a sponge or plastic bristle brush. Once you have hit all the areas and you can no longer see any gunk, it is time to rinse the WHOLE ATV off.
Grab a towel and dry the entire quad off after you finished rinsing it. We don’t want any rust to start forming because we missed some spots after a wash. It is not a bad idea to grab some spray on polish and coat the plastics, seat, and other surfaces to keep them from oxidizing over the long winter months.
Since we are riding off road our quads will get tons of dirt, mud, and debri in to all the nooks and crannies and can hold water in causing rust to start forming. Dirt and grime will also cause your moving parts to break down more quickly. Cleaning should be done often, not just before winter.
Lube Up Your ATV
Now that your ATV is shiny and sparkly clean, we have to make sure we protect all the components that could rust or corrode. Things like the chain, drive shaft, U-joints, CV joints, suspension, throttle cable, brake cable, and clutch cable. You will want all these areas lubed up and in great working condition because they will not only affect your ride, but if not maintained can cause your ride to come to a stop early one day if one of these components wears out or breaks due to improper maintenance.
There are specialized lubes for some of these components like the chain but most can be lubed using regular waterproof grease. While lubing up all these parts, make sure you check rubber boots and components throughout the ATV for wear, cracks, or dry rot. These rubber components help to protect your critical joints and bearings ao it is crucial to make sure they are not going to fail and downtime during the winter months is the perfect time to replace them.
Dirt and gunk can get into the moving parts of your ATV and cause wear over time. Things like sand and gravel can get inside your bearings and damage them and lubrication helps reduce that. Lubrication also reduces the friction of those moving parts to keep them from their wear when they rub or move against each other during normal operation.
Service Your Coolant
If you have a liquid cooled engine, then it is a good idea to service your ATVs coolant system before you store it for the winter. If you’ve kept up on standard maintenance, you are probably okay to just store your ATV without replacing the coolant. The recommendation is about every two years, but you should check your owner’s manual to make sure that is the recommendation for your ATV. Even if you have kept up on maintenance, it’s not a bad idea to flush the cooling system and replace it with new coolant if you plan on storing your ATV for several months over the winter.
As your coolant is used in an ATV it will deteriorate in performance over time. This can be caused by a build up of aluminium corrosion or when a change in the fluid to coolant ratio occurs when you top off your coolant system. Most coolants contain special ingredients to help keep the solution more alkaline and will lose effectiveness over time.
Service the Oil
Changing the oil is one of the most important and most often performed routine maintenance actions. ATV engines are run hard most of the time and the oil makes sure the engines internal components are clean, protected, lubricated to prevent excessive wear.
Once the engine is run and the oil goes through the internal compartments over and over, removing the dirt, the oil becomes dirty itself causing it to not be effective. Old oil does not do its job to protect your engine components and will cause wear at a faster rate and cost lots of money in the long run. Check out this article I wrote about changing the oil in a 4 stroke engine to learn how to properly maintain your oil system in more detail.
Air Filter Maintenance
Service your air filter by cleaning it out or replace it with a new one before you store your ATV for the winter.It is very easy to clean an ATV filter. If an air filter is not cleaned properly and oiled up well enough, it can cause debris such as sand, dirt, and dust to get into your engine through the intake. With a properly maintained filter your engine will last many years longer than if maintenance is neglected. When you pull your ATV out of storage at the end of winter and are ready for a ride, it will be ready to go.
Lube the Cylinders
If you are going to store your ATV for an extended period of time then you probably need to think about fogging your engine. You will have to remove the air filter and start up the engine in order to do this step. You need to spray the fogging oil directly into the intake while the engine is running. It won’t take long for the fogging oil to work its way through the engine and get combusted. (You can see it come out of the exhaust.) Fogging the ATVs engine is a process applies a protective coating to the internal components that are critical to proper engine performance such as the cylinder, pistons, and valves. Performing this step is similar to replacing the oil and lubing up the quad as it will prevent rust and corrosion.
If you don’t want to fog your engine there is an alternative method that can be done. You will have to take a ratchet and unscrew the spark plug. Pour a teaspoon of oil and dump it inside the spark plug housing and then reinstall the spark plug making sure to torque it to the proper setting. Make sure you do not replace the spark plug cap because you are not going to start the engine. You only want to crank the engine a few times but not have it turn over and start up. Doing this a few times will coat all the internal components with oil to prevent rust and corrosion.
Service the Fuel System
Ethanol gas is used at all gas stations and you will most likely be using that type of gas to fill up your ride and ethanol likes to attract water. We definitely do not want water getting into our fuel system because that will cause a ton of problems whether you have a fuel injected system or a carbureted system. After gas has been sitting it starts to varnish and separate and the ethanol will settle down to the bottom of your fuel tank and if there is any condensation inside the tank, the ethanol will bring that water along with it. Treating the gas with a fuel stabilizer can easily prevent this problem and is a simple and cheap way to make sure your fuel system is good to go.
Once you have treated your fuel system you will need to let it run through your machine to make sure all the fuel has been treated. Fuel can remain inside the lines of the ATV even after the engine has stopped so you want to circulate the fuel to get the stabilizer into every fuel component. All you have to do is start up your quad and ride it around for a good 5 or 10 minutes to circulate the fuel.
Check Your Battery
When putting your ATV into storage, it’s always good to remove the battery from the machine and place it on a drip charger or similar device to keep it charged. You should probably go ahead and install quick-disconnect leads. They will make it easy to pull the power and ground cables off the battery without having to unscrew them from the terminals, which can be a pain depending on your setup and you can also just plug these connections into your smart charger. You can also buy battery clamp leads that just hook right up to your battery.
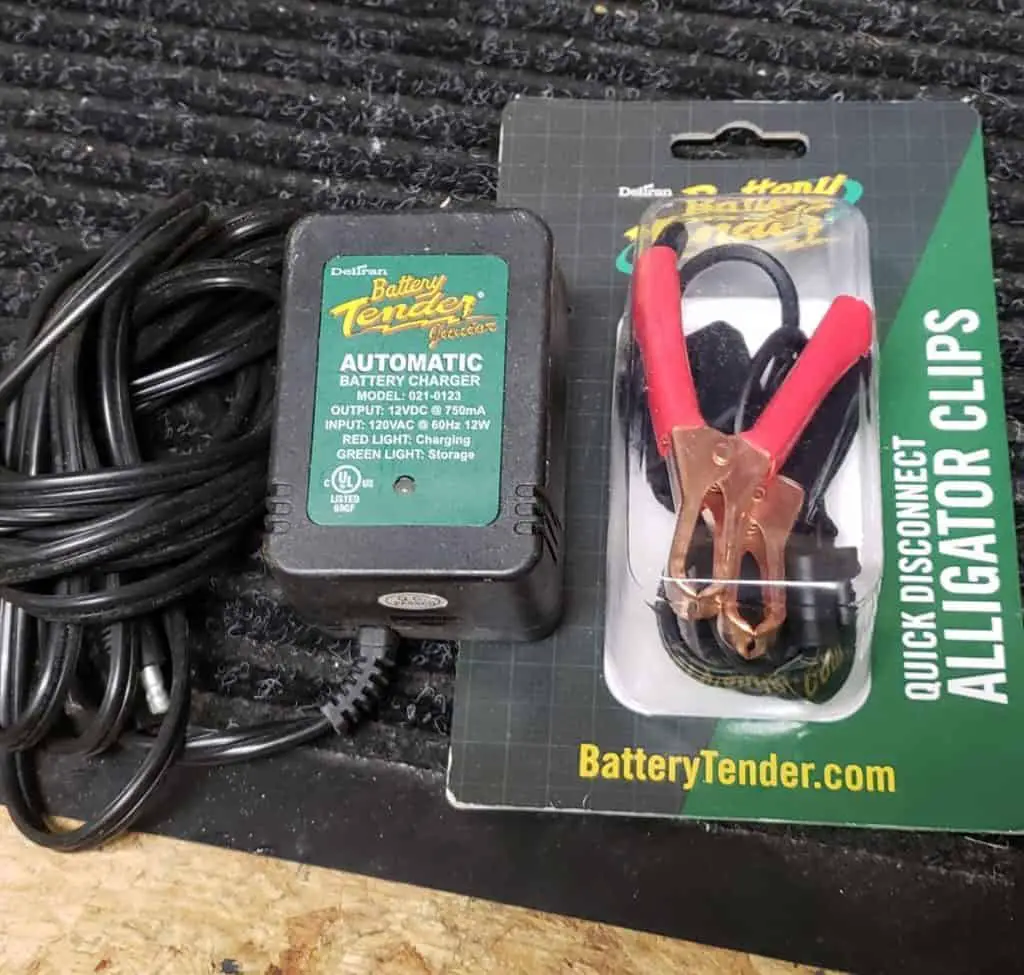
If you remove the battery and let it sit all winter, it may still drain. Purchase a “drip” or smart charger like this one from Amazon and it will charge up the battery only when it depletes some charge.
Check Tires
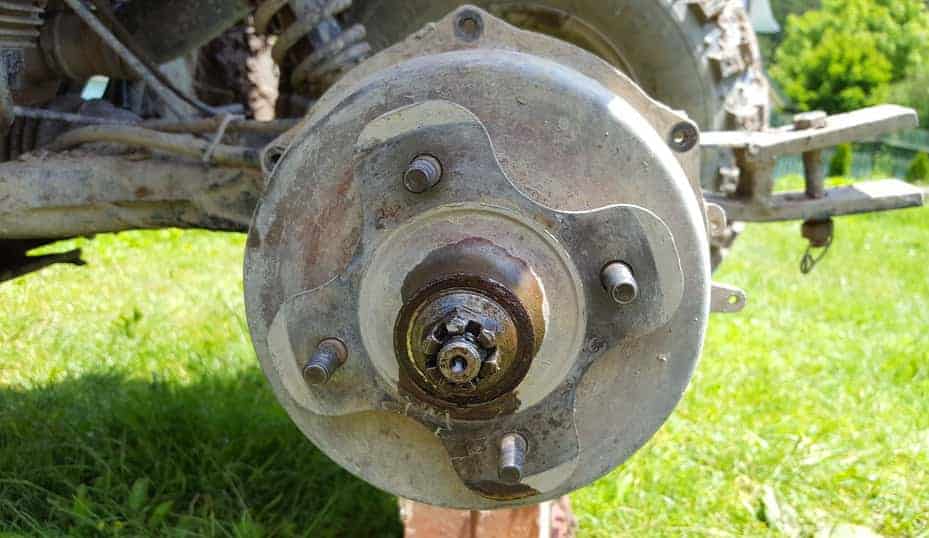
You are going to want to make sure your tires are in proper order for the next riding season. Inspect each tire and make sure there is nothing that has punctured the tire and is still inserted like a nail or a screw. These can become embedded in your tire but not cause them to go flat but can cause a problem if you ride on them not knowing. Inspect the tread on your tires and make sure they are not too worn because worn tires mean your ATV will not grip the dirt and your handling will decrease and possibly cause you to lose control.
Putting your ATV up on stands is a great idea if you can afford to buy a stand. If you can’t then you should find some way to elevate both tires off the ground. This will keep them from getting flat spots and needing to be replaced before the next riding season.
Carburetor
If your ATV comes with a carburetor instead of fuel injection, then it is important to drain the carburetor, especially if your fuel stabilizer isn’t alcohol-free. With the ATV running, close the fuel petcock valve and let the engine run out of fuel. Now let the engine cool down and locate the drain screw for the float bowl. Unscrew the drain screw and let the remaining fuel from the carburetor drain out into a container.
Protect From Animals
Storing an ATV inside or outside can pose a potential for small animals and other critters to make their new homes in your shiny and clean ATV you are trying to store for the winter. Often the animals will crawl up inside the undercarriage or into the wheel wells and make their nests or homes from your ride. This can cause several issues that you do not want to deal with. If they are still there or have had babies in the spring when you go to start up for a ride it can cause them to get caught in the moving parts and make a big animal mess that you will have to clean up. Along with this, animals may chew holes in brake lines or electrical components and plastics in order to make sure they are comfortable and this can lead to a much more expensive problem than a simple clean up.
The simplest way to keep critters out is just to cover up any openings that they might crawl into with some duct tape and make sure any other areas can be visible when it is time to bring the quad back out to play. You will have to do a post storage inspection to ensure there are no critters hanging out.
You might want to block off the inlet ports to the air box to prevent any animals from building nests inside the intake system. If you do decide to block off the inlet ports make sure to leave a flag or some sort of indicator reminding you to unblock them in the spring.
Store Your ATV
I realize that not everyone has a garage or even a building to store their ATV in but there are still steps to take that can help protect it from the harsh elements and preserve its components. If you have a garage or a building or even a trailer, this is preferential to storing them outside in the elements. I recommend you cover your ATV with a proper ATV cover or tarp that will cover it to the ground no matter where you decide to store it.
Depending on where you are located and how harsh or mild the winters are in your area, you might want to look into getting a cover with ventilation to make sure you are not going to trap any moisture inside negating all the work you did winterizing the past hour and a half or so. The cover protects the ATV from snow, rain and sun which will cause wear over time.
In the End, You Decide How much You Need to Do to Winterize Your ATV
This in depth guide on winterizing your ATV is not for all people and you can get away with the 10 minute method but if you are like me and like to keep your ATV in tip top shape then you should really invest the time to winterize your machine the right way.
